
Learn how to make a rice dish with crispy bottom using simple steps. Discover tips and techniques for achieving the perfect golden, crunchy crust every time.
As an Amazon Associate I earn from qualifying purchases.
Making a rice dish with crispy bottom can elevate your home cooking to a whole new level. This popular culinary technique, celebrated in numerous cultures worldwide, delivers both texture and flavor in each spoonful. By layering long-grain rice and forming a crackling golden crust underneath, you’ll wow guests at a dinner party or simply treat yourself to something special. With the insights provided by Expert Reviews Best Rice Cooker, even first-time cooks can replicate this beloved method at home. Ready to master the timeless appeal of a perfect crispy layer?
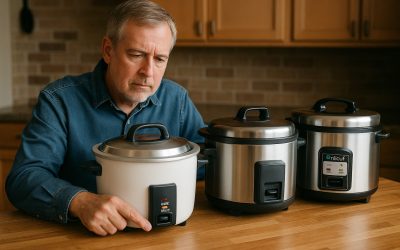
Making Persian rice with the perfect tahdig requires patience, skill, and the right equipment. While traditional stovetop methods work well, using a high-quality Persian rice cooker can simplify the process and guarantee consistent, restaurant-quality results. If you’re looking for a reliable appliance to enhance your rice-making experience, check out our guide on top-rated Persian rice cookers for authentic flavors and discover the best models designed to deliver flawless Persian rice every time.
———
Table of Contents
———
…
Understanding the Appeal of Crispy Rice
Crispy rice didn’t become a global phenomenon by accident. In Middle Eastern cuisine, it’s often referred to as tahdig, translating to “bottom of the pot.” In Asian households, a similar crunchy bottom layer is prized for adding variety to otherwise simple grains. The contrast between fluffy, moist rice on top and a golden-brown crust at the base provides a delightful interplay of textures. When approached with care, the result is a rice dish with crispy bottom that transforms an everyday staple into a centerpiece worthy of special occasions.
Yet many home cooks are daunted by the idea. They fear burning the rice or ending up with a gummy crust. Fortunately, both issues are easily avoided once you understand the critical balance of temperature, timing, and moisture. By selecting quality ingredients, parboiling (or rinsing) the grains, and using the proper vessel, your first attempt at making a rice dish with a crackly foundation can be incredibly rewarding.
Selecting Your Ingredients and Equipment
While the spotlight often falls on the crust, the type of grain you choose sets the tone for the entire dish. Successfully cooking a rice dish with crispy bottom typically involves:
Long-Grain Rice
Varieties such as basmati or jasmine are ideal due to their slender shape and lower starch content, which help the grains remain separate and airy.
Salt
Seasoning from the start ensures each grain carries flavor. Salting your parboiling or soaking water can be especially effective.
Fat
Whether you use butter, vegetable oil, or a combination, the right amount of fat at the bottom of the pot is crucial for achieving a crisp, golden surface.
Water
Used to parboil or rinse, and also for steam generation. Getting the ratio right guarantees neither soggy nor dry results.
Optional Flavors
- Saffron: Dissolve in warm water for a burst of color and fragrance.
- Yogurt: Mixing a small portion of parboiled rice with yogurt creates an extra layer of crunch and tanginess.
- Herbs and Spices: Dill, parsley, cumin, or a hint of cardamom can elevate the final taste.
Recommended Equipment
- Heavy-Bottomed Pot: The pot you select should conduct heat evenly. A non-stick or well-seasoned cast-iron pot offers additional insurance against sticking.
- Towel-Wrapped Lid: Wrapping your lid in a clean, dry towel absorbs condensation, preventing the crust from turning mushy.
- Strainer or Sieve: Key for rinsing or draining the rice after parboiling.
- Wooden Spoon: Helps gently layer the rice without breaking grains.
If you want to simplify the process further, or you prefer more automated methods, a specialized Persian rice cooker—often praised by Expert Reviews Best Rice Cooker—can guide you through precise heat cycles designed to yield that characteristic crispy bottom with minimal guesswork.
Step 1: Rinse or Soak the Rice
Measure Your Rice
Plan for roughly 1 cup of uncooked rice per 2 servings. For a moderate crowd, 2 cups will suffice.
Rinse
Place the rice in a bowl. Fill it with cold water, swish gently, and drain the cloudy water. Repeat until the water runs relatively clear. This removes extra starch that could cause stickiness.
Optional Soak
Some cooks prefer soaking the grains in salted water for 30 minutes to an hour. Soaking helps the rice expand and produce a fluffier outcome.
This simple prep ensures each grain remains distinct, forming the best foundation possible for your rice dish with crispy bottom.
Step 2: Parboil (If Following Traditional Methods)
Boil Water
If you’re using a stovetop approach, bring a large pot of salted water to a rolling boil—about 8 cups for 2 cups of rice.
Add Rice
Gently tip in the drained rice. Let it boil for 4–6 minutes, testing a grain occasionally. It should be slightly tender on the surface but still firm at the core.
Drain
Switch off the heat and pour the rice into a colander or sieve, rinsing briefly with cold water. This halts cooking and removes excess surface starch.
Some people skip the parboiling stage and cook the rice from scratch in the pot. However, parboiling allows for a more controlled environment for the final steaming phase—often ensuring a more reliable crust.
Step 3: Preparing the Crust Layer
Heat the Pot
Return the empty pot to the stove on medium heat. Add 2–3 tablespoons of oil or a blend of oil and butter. Swirl to coat evenly.
Optional Yogurt Mixture
If you love an extra-crunchy result, mix ½ cup of the parboiled rice with 1–2 tablespoons of yogurt and a drizzle of saffron water. Spread this mixture in a thin layer across the bottom of the pot.
Lay the Base
If you’re not using the yogurt trick, simply place a thin layer of rice into the pot, forming the foundation for your crust. Some people also use potato slices or thin bread for added texture.
At this juncture, your pot is primed to transform the bottom layer into a delightful crunch. The combination of heat and the precise amount of fat ensures that the rice base develops a caramelized, slightly nutty flavor.
Step 4: Layering and Steaming
Add Remaining Rice
Gradually spoon in the remaining parboiled rice. Aim to form a gentle mound rather than flattening it, which helps steam circulate.
Create Vent Holes
Use the handle of a wooden spoon to poke a few holes. These vents allow steam to travel upward and keep the grains from clumping.
Season and Enhance
Sprinkle additional salt or saffron water. For a herby note, mix chopped dill or parsley into some of the layers.
Towel-Wrapped Lid
Cover the pot with a lid wrapped in a clean towel. This step traps steam while preventing droplets from falling back onto the rice, preserving that all-important crust.
Maintain the heat on medium for about 5 minutes, just long enough for the bottom layer to begin forming a crust. Then, reduce the heat to low. Steam for 30–40 minutes, resisting the urge to open the lid too often. Every peek releases steam and could sabotage your crunchy masterpiece.
Step 5: The Big Reveal
After the steaming period, your rice dish with crispy bottom should be cooked to fluffy perfection—soft grains on top, golden crispiness below.
Rest
Turn off the heat and let the pot rest for a couple of minutes. This brief interval helps the crust release from the bottom more cleanly.
Flip
Place a wide serving plate over the pot. Firmly hold the pot and plate together, then flip in one swift motion. Gently lift the pot. If all goes well, you’ll unveil a glistening, crunchy layer atop a mound of snowy rice.
Garnish
A sprinkle of saffron, toasted nuts, or dried fruit can add color and intrigue. Revel in the applause that typically follows this dramatic presentation!
Unveiling a well-caramelized crust is a shared highlight in many cultural dining traditions. Whether you call it tahdig, socarrat, or guoba, the sense of accomplishment and the crunchy payoff remain universal.
Serving Suggestions
This rice dish with crispy bottom can stand on its own or serve as a foundation for various mains:
Stews and Curries
Saucy dishes like Persian ghormeh sabzi or Indian curries contrast beautifully with the texture of crispy rice.
Kebabs
Grilled or skewered meats—such as kebab koobideh—make a savory, protein-packed partner.
Seafood
Pan-seared fish fillets or grilled shrimp bring a delicate flavor that doesn’t overshadow the crispy highlight of the rice.
Yogurt and Herb Dips
Cooling accompaniments like mast-o-khiar or raita add tanginess and offset the richness of the crust.
If you’re aiming for a feast, pair the dish with fresh salads, pickled vegetables, or soups. The crunch of the crust draws out complexities in each side, elevating the meal from ordinary to spectacular.
Tips for Troubleshooting
Even experienced cooks sometimes stumble when crafting a rice dish with crispy bottom. Here are a few common issues and solutions:
Burnt Bottom
The heat may have been too high for too long, or you might not have lowered it after the initial sizzle. Try reducing the initial browning stage or lowering the flame sooner.
Stuck Crust
If the crust doesn’t release, it might need more cooking time on low heat, or you used too little oil. Ensure the pot is well-coated and wait an extra minute or two before flipping.
Gummy Texture
Overcooking or skipping a thorough rinse can leave too much starch in the pot. Parboiling for the right duration helps each grain stay distinct.
Learning to troubleshoot is half the fun. Each attempt—whether a triumph or a near miss—builds the intuition you need for consistent success.
Adapting for Different Preferences
While the concept of a rice dish with crispy bottom is deeply rooted in various culinary cultures, there’s plenty of room for personal flair:
Brown Rice
Adjust parboiling times for this more fibrous option, which can take longer to soften. The end result can still form a crust, though it might need a bit more oil and time.
Vegan or Dairy-Free
A vegetable oil base works just as well as butter. If you want the tangy twist of yogurt tahdig, opt for a plant-based yogurt alternative.
Garnishes Galore
Barberries, saffron-infused grains, or toasted almonds each deliver a visual pop and a new layer of flavor.
Experiment freely with grains, fats, and seasonings until you discover the perfect synergy for your palate.
Storing and Reheating Leftovers
Rarely will such a delicacy remain uneaten, but if you do end up with leftovers:
Cool Properly
Allow the rice to come to room temperature.
Refrigerate or Freeze
Seal in an airtight container. If freezing, consider portioning it out to reheat only what you need.
Reheat Techniques
- Skillet: Best for preserving crispiness. Add a drizzle of oil, spread the rice in a thin layer, and warm over medium heat.
- Microwave: Quick but can soften the crust. Add a splash of water and cover loosely.
Though not quite as magical as freshly flipped, leftover crispy rice can still be deliciously revived with gentle reheating methods.
Embracing Cultural Traditions
From Iranian tahdig to the Spanish socarrat at the bottom of a paella, many cultures celebrate a rice dish with crispy bottom as a culinary treasure. Incorporating these techniques into your cooking routine not only enriches your recipe repertoire but also connects you to a global tapestry of food traditions. It’s a testament to how small changes in cooking methods—like letting the bottom caramelize—can dramatically alter the taste and texture of a staple ingredient.
And don’t forget: if you’re eager for more consistent results or you want to save time, check out modern appliances recommended by Expert Reviews Best Rice Cooker. These specialized tools maintain precise heating cycles, automate parts of the process, and drastically reduce the learning curve for achieving a crisp layer.
Frequently Asked Questions (FAQ’s)
Question: What is the key to achieving a crispy bottom layer in rice dishes?
Answer: The key to achieving a perfect crispy bottom layer, also known as tahdig in Persian cuisine or socarrat in Spanish paella, lies in three essential factors: the right cooking technique, proper heat control, and using enough oil or butter. The rice must be parboiled to ensure it is partially cooked before layering, and the bottom of the pan should be well-greased to prevent sticking while encouraging a crisp, golden crust.
Question: What type of rice is best for making a crispy-bottom dish?
Answer: Long-grain basmati rice is ideal due to its separate, non-sticky texture, which allows the crispy layer to form without becoming mushy. However, short-grain varieties can also be used, especially in dishes like Spanish paella or Korean nurungji, where a stickier consistency is desired.
Question: How should rice be prepared before cooking?
Answer: To ensure perfect texture, rinse the rice under cold water until the water runs clear to remove excess starch. This prevents clumping and ensures a fluffy texture. Soaking the rice in salted water for 30 minutes to an hour allows it to absorb water evenly, leading to better results when cooked.
Question: What is the best way to create a crispy rice layer?
Answer: Start by heating a generous amount of oil, butter, or ghee in a heavy-bottomed pan or nonstick pot over medium heat. Arrange the parboiled rice in the pot, gently pressing a small portion at the bottom while keeping the rest of the rice loosely piled on top. This ensures proper steaming while allowing the crispy crust to form.
Question: What cooking technique ensures an evenly golden, crispy bottom?
Answer: Cook the rice on medium-high heat for 10–15 minutes to allow the crust to form, then reduce the heat to low and cover the lid with a clean kitchen towel to absorb excess moisture. Let the rice steam for 30–45 minutes to ensure the grains fully cook while the bottom layer becomes crisp and golden.
Question: How do you remove the crispy rice without breaking it?
Answer: Before serving, let the rice sit off the heat for 5 minutes to allow the crust to firm up. Run a spatula along the edges to loosen the rice. One helpful trick is to place the bottom of the pan in cold water for a few seconds, which helps the crust release naturally. To serve, place a large plate over the pot and flip it upside down to reveal the crispy rice layer intact.
Question: What are some common mistakes to avoid when making crispy-bottom rice?
Answer: Using too much water can make the rice mushy and prevent the crispy layer from forming properly. Not using enough oil or butter at the base may result in the rice sticking to the pot. Additionally, lifting the lid too frequently during cooking lets out essential steam, which can interfere with both the steaming process and crust formation.
Question: How can you enhance the flavor of crispy rice dishes?
Answer: For extra depth, drizzle saffron-infused water over the rice before steaming for added fragrance and color. Some variations include layering thinly sliced potatoes, yogurt, or flatbread at the bottom of the pot for unique textures and flavors. You can also season the oil with garlic, turmeric, or paprika before adding the rice to enhance the crispy layer’s taste.
Conclusion
Creating a rice dish with crispy bottom marries straightforward technique with culinary artistry, offering a combination of textures that delights the senses. The moment you flip the pot and unveil that golden-crunch tapestry resting atop fragrant, fluffy grains is a highlight every home cook should experience. Whether you stick to the classic stovetop method or rely on a specialized appliance endorsed by Expert Reviews Best Rice Cooker, your efforts will be rewarded with a dish that epitomizes both tradition and innovation. With each successful attempt, you’ll gain the confidence and inspiration to explore even more variations—potentially developing a signature crispy rice dish that dazzles friends, family, and, most importantly, your own taste buds. Enjoy the journey, and savor every satisfying crunch.