

Learn how to make the perfect tahdig with this Iranian crispy rice recipe. A beginner-friendly, step-by-step guide to golden, crunchy, and delicious rice.
As an Amazon Associate I earn from qualifying purchases.
If you’ve ever wanted to master the art of creating golden tahdig—a coveted, crunchy layer beneath tender, aromatic rice—this detailed guide will walk you through every stage of an Iranian crispy rice recipe. Drawing on time-tested techniques and recommendations from Expert Reviews Best Rice Cooker, we’ve tailored these instructions so even novices can achieve mouthwatering results. From selecting the perfect rice variety to nailing the ideal cooking temperature, you’ll learn the fundamental methods that make Persian cuisine so celebrated. Ready to impress your family and friends with your newfound tahdig prowess?
Achieving the perfect tahdig—that crispy, golden crust at the bottom of Persian rice—is both an art and a science. While traditional methods require precise timing and careful heat control, using a high-quality Persian rice cooker can simplify the process and guarantee consistent results. If you’re looking for the best appliance to elevate your Persian rice game, discover the secret to tahdig with a Persian rice cooker and find the top-rated models designed for perfect, foolproof cooking.
———
Table of Contents
———
…
Introduction to Iranian Crispy Rice (Tahdig)
Cooking crispy rice is an essential skill in Iranian cuisine, a style of cooking revered for its fragrant dishes, vibrant ingredients, and artistic presentation. At the heart of this practice is tahdig—the browned, crunchy layer at the bottom of the pot that transforms a simple bowl of rice into a culinary delight. In Iran, many people consider tahdig the highlight of the meal, eagerly vying for the largest share of its irresistible crunch.
While the notion of forming a crust might sound intimidating, it’s actually quite straightforward once you’re familiar with the process. This Iranian crispy rice recipe focuses on basmati or other long-grain varieties, although you can adapt the method to suit other types of rice. The primary difference lies in parboiling the grains, layering them with oil or butter, and applying gentle yet consistent heat to produce that crispy bottom.
Aside from its scrumptious texture, Iranian crispy rice is also a feast for the eyes. When you invert the pot onto a serving plate, revealing a golden crust worthy of admiration, you’ll understand why so many home chefs worldwide are eager to perfect this dish. Whether you’re an absolute beginner in the kitchen or a seasoned cook seeking to expand your repertoire, the step-by-step instructions in this guide will help you achieve crowd-pleasing results.
Why This Recipe Works for Beginners:
Clear Steps
This recipe breaks down each phase—from selecting and washing the rice to achieving the perfect crunch—so you understand not just what to do, but why it matters.
Simple Equipment
You can execute this Iranian crispy rice recipe using basic kitchen tools like a large, heavy-bottomed pot and a strainer. If you have a specialized Persian rice cooker, the process can be even more foolproof.
Adaptable Method
While basmati rice is generally preferred for its aroma and texture, the recipe accommodates other varieties. You’ll learn how to adjust cooking times and water ratios if you experiment with different grains.
Accessible Ingredients
Beyond rice, you’ll need water, oil or butter, and salt—staples most people already have at home. Optional ingredients like saffron or yogurt can further enhance flavor, but are not mandatory for success.
Detailed Explanations
For each key step, we provide tips to avoid common pitfalls—like scorched bottoms or soggy grains—ensuring you feel confident as you cook.
By following these guidelines, you’ll build a solid foundation in Persian-style rice preparation. Mastering crispy rice lays the groundwork for exploring other beloved dishes, such as sabzi polo (herbed rice) or zereshk polo (barberry rice), which feature layers of flavor on top of the crunch.
Essential Ingredients:
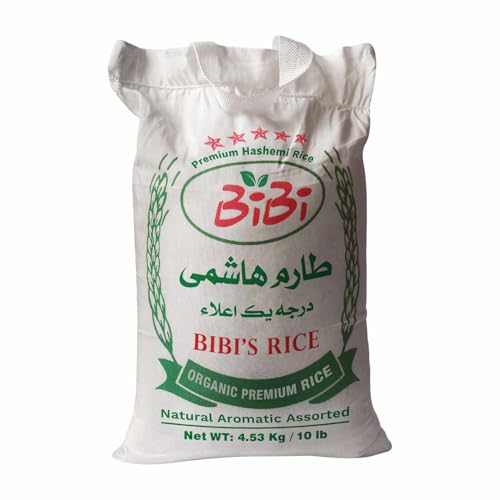
- Rice: Basmati is the top choice for this Iranian crispy rice recipe because of its long grains and delicate scent. If possible, opt for aged basmati; the grains tend to remain firm and separate more easily than fresh varieties.
- Salt: Helps season the rice and ensures better absorption of water, leading to fluffier grains.
- Oil or Butter: You’ll need enough to coat the bottom of your pot. Butter adds richness, while vegetable or canola oil delivers a clean, neutral taste. Some prefer a mix of both for flavor and high-heat stability.
- Water: Used for parboiling the rice and for steam formation in the final cooking stage.
- Optional Ingredients:
- Saffron: Drizzle saffron-infused water over the parboiled rice before steaming for a distinctive aroma and hue.
- Yogurt: A spoonful mixed into a portion of the parboiled rice can yield a tangy, crispier crust.
Equipment You’ll Need:
Heavy-Bottomed Pot or Persian Rice Cooker
A sturdy pot ensures heat distributes evenly, minimizing hot spots that can scorch the rice. If you own a Persian rice cooker (many come with special tahdig settings), your job becomes even simpler.
Strainer or Colander
Essential for draining the parboiled rice. Fine mesh works best if you’re dealing with slender basmati grains.
Wooden Spoon
Helps gently stir the rice without breaking the grains, and it’s useful for creating steam vents if you use the stovetop method.
Towel or Lid Wrap
Wrapping the lid with a clean kitchen towel helps absorb excess moisture, ensuring the rice doesn’t become soggy.
Large Platter
You’ll flip the pot onto this dish to reveal the crisp crust on top. Choose something wider than your pot’s diameter to accommodate the entire rice cake.
Step-by-Step Instructions:
1. Rinse and Soak the Rice
- Measure: For a family of four, start with about 2 cups of basmati rice. Adjust quantities as needed.
- Rinse: Place the rice in a large bowl or the pot you plan to cook in. Fill it with cold water and swirl gently. Drain away the cloudy water, then repeat until the water runs mostly clear.
- Soak: After rinsing, let the rice soak in cold water with a generous pinch of salt for at least 30 minutes. Soaking improves texture and reduces cooking time, making it easier to achieve separate grains.
2. Parboil the Rice
- Boil Water: In a large pot (if not using a Persian rice cooker), bring roughly 6–8 cups of water to a rolling boil. Add about 1 tablespoon of salt to the water.
- Cook Briefly: Drain the soaking water from the rice, then carefully add the grains to the boiling pot. Let them boil, uncovered, for about 4–6 minutes. The timing depends on the rice’s age and variety.
- Test Doneness: Retrieve a grain. It should be soft on the outside but still slightly firm at the core—al dente.
- Drain: Turn off the heat and pour the rice into a strainer. Rinse with a little cold water to halt the cooking process and to wash away excess starch.
3. Prepare the Pot for Tahdig
- Choose Your Fat: Spoon 2–3 tablespoons of oil or butter into the now-empty pot. Return the pot to medium heat. Swirl to coat the bottom evenly.
- Optional Flavor Boost: If using saffron, drizzle a bit of saffron-infused water into the base.
- Layer for Crunch: Some cooks set aside a small portion of parboiled rice, mixing it with yogurt. Spread this yogurt-coated rice or a thin layer of plain rice at the bottom to form the first crispy layer. Alternatively, potato slices or flatbread can be arranged on the base for a different kind of tahdig.
4. Build the Rice Mound
- Gently Add Rice: Gradually spoon the remaining parboiled rice into the pot, forming a gentle mound. This shape promotes even circulation of steam.
- Vents: Use the handle of a wooden spoon to create several holes in the rice, allowing steam to escape evenly. This step is crucial to preventing sogginess.
- Steam Seal: Wrap the lid in a clean towel to capture excess moisture. Place it on the pot to seal in steam.
5. Cook and Crisp
- Initial Heat: Keep the pot on medium heat for about 5–7 minutes to set the crust. You’ll hear a gentle sizzling as the oil and parboiled rice begin to form tahdig.
- Lower Heat: After this initial phase, reduce the heat to low. Cook for another 30–40 minutes. Patience is essential here; opening the lid repeatedly lets out steam and disrupts cooking.
- Check for Aroma: About halfway through, you might smell a toasty aroma—a good sign the crust is forming. Avoid the temptation to peek; trust your nose and the clock.
6. The Big Reveal
- Rest: Once the rice has fully steamed and the crust has formed, turn off the heat. Let the pot stand for a minute or two. This rest helps the crust separate from the pot more easily.
- Invert: Place a wide platter over the pot and, holding both firmly, flip them in one swift motion. Gently lift the pot to reveal your masterpiece—crispy tahdig on top and fluffy rice beneath.
- Serve: For added flair, garnish with saffron water, nuts, or dried fruit. Pair with stews, kebabs, or a simple side salad. The crunchy tahdig is typically served front and center, often broken into shards that guests can share.
Tips for Success:
Mind the Soak
The soaking stage is one of the defining aspects of any Iranian crispy rice recipe. Neglecting this step can lead to uneven grains that resist fluffing.
Salt Wisely
Salt is critical for flavor development. Persian recipes often salt generously during the parboil step, then rely less on salt later in the cooking process.
Experiment with Flavors
Consider sprinkling aromatic herbs like dill or cilantro during the layering, or adding barberries (zereshk) for a burst of tangy sweetness.
Golden Brown, Not Burnt
Achieving that perfect hue requires attentiveness to heat settings. If your crust is too dark, lower the heat or reduce the initial medium-heat duration.
Use a Non-Stick Pot
Non-stick surfaces can be a boon for beginners, reducing the risk of your crust sticking. Ensure you don’t scratch this surface with metal utensils.
Stay Patient
Resist the urge to open the lid frequently or stir the rice. One of the biggest errors novices make is fussing with the rice while it steams.
Common Mistakes to Avoid:
Skipping the Parboil
Don’t assume you can just rinse and cook in one go. Parboiling ensures the grains won’t stick or become clumpy.
Using Too Little Oil
Oil or butter is essential for forming an even crust. Skimping on it might yield a dry, unevenly browned tahdig.
Overcrowding the Pot
Exceeding the recommended capacity leads to inconsistent steam distribution. If cooking for a large party, consider multiple batches.
High Heat for Too Long
While an initial high-heat phase helps set the crust, forgetting to lower the temperature can scorch the bottom.
Neglecting the Lid Towel
Trapped moisture can drip onto the rice, ruining its texture. A towel or specialized rice cooker lid insert absorbs extra condensation.
Variations on the Basic Recipe:
Once you’ve nailed the fundamental Iranian crispy rice recipe, you can branch out into creative adaptations.
Potato Tahdig
Lay thinly sliced potatoes at the bottom of the pot, lightly coated in oil. They’ll crisp up into a golden layer that pairs beautifully with the fluffy rice.
Lavash Tahdig
An alternative uses thin flatbread called lavash. The bread soaks up the oil and browns into a crunchy, edible layer.
Yogurt Tahdig
Mix a cup of the parboiled rice with a few tablespoons of yogurt and perhaps an egg yolk for added richness. Spread this mixture across the bottom to form a thicker, tangy crust.
Saffron Tahdig
Add saffron-infused water to the bottom of the pot or drizzle it over top layers, lending an intensified golden color and heady aroma.
Layered Polo
Infuse extra flavor by layering saffron-laced rice and plain rice in the pot, creating a striped effect when you serve.
Each variation offers a new dimension of taste and texture, allowing you to showcase the versatility of Persian rice. The more you experiment, the more comfortable you’ll become in adjusting heat, timings, and flavorings to produce your ideal version of tahdig.
Pairing Ideas:
Persian cuisine is filled with dishes that complement the crunchy rice and aromatic grains in this Iranian crispy rice recipe:
Ghormeh Sabzi
A herb stew with kidney beans and tender meat (often lamb or beef). Its tangy flavors contrast beautifully with the buttery crust.
Fesenjan
A sweet-sour stew made from pomegranate molasses and crushed walnuts, often served with chicken. Drizzle it around or atop crispy rice for a complex flavor profile.
Kebab
From koobideh (ground meat) to barg (thinly sliced filet), kebabs bring smoky, savory notes that pair brilliantly with the subtlety of basmati rice.
Mast o Khiar
A cooling yogurt and cucumber dip that refreshes the palate amid the rich flavors of crispy rice and stews.
Grilled Vegetables
Zucchini, peppers, and onions marinated in herbs or spices round out a vegetarian-friendly meal that still highlights the tahdig.
Using a Persian Rice Cooker:
If you’re short on time or prefer a more automated approach, consider investing in a Persian rice cooker. Many models come with specialized tahdig settings that regulate temperature and cooking phases:
Measurement Guides
Most rice cookers have gradations on the inner pot, making it easier to measure water precisely.
Automated Parboil
High-end Persian rice cookers often replicate the parboiling phase, though you may still prefer manual rinsing and soaking.
Crisping Mode
The star feature: once the rice is cooked through, the cooker shifts to a crisping mode for several minutes, forming the tahdig without guesswork.
Less Monitoring
You can set it up and walk away, freeing your attention for other dishes or tasks.
Consistent Results
Precision engineering helps ensure each batch turns out with a reliably crispy bottom. Many Iranian households have relied on these specialized appliances for years.
If you’re in the market for such a device, you might consult resources like Expert Reviews Best Rice Cooker to compare brand reputations, key features, and price points. The convenience of technology doesn’t diminish the thrill of flipping the pot to reveal your golden crust; it just reduces the margin for error.
Serving and Garnishing Your Masterpiece:
Presentation matters in Persian cuisine. When you finally lift the pot and admire your tahdig, consider these final touches:
Saffron Threads
Crumble saffron strands over the surface, or drizzle saffron-infused water in a pattern.
Pistachios or Almonds
Sprinkle slivered nuts for added crunch and an elegant pop of color.
Dried Fruit
Raisins, barberries, or chopped dried apricots lend a sweet, tangy contrast to the savory rice.
Herbs
Finely chopped parsley, dill, or chives can adorn the edges of your serving platter, introducing a fresh, green element.
Such thoughtful plating not only impresses guests but also reflects the care that goes into every step of cooking Persian rice.
Storing and Reheating Leftovers:
Though tahdig is best enjoyed immediately—when it’s crisp and hot—you can still store and reheat any remaining rice:
Refrigerate Promptly
Transfer leftovers to an airtight container once they’ve cooled to room temperature.
Reheat Methods
- Stovetop: Return the rice to a non-stick pan with a splash of water or broth. Cover and warm on low heat. If you want to revive some crunch, add a bit of oil at the bottom.
- Oven: Spread the rice in a shallow dish, drizzle with a little water or oil, and heat at 300°F (150°C) until warm.
- Microwave: Quick but less ideal for maintaining crispness. Add moisture to prevent dryness.
Re-Crisping
If your tahdig softens after storage, place it in a pan with a small amount of oil over medium heat. Cook for a few minutes to restore some crunch.
While the crust won’t be identical to freshly made, these methods still yield tasty leftovers perfect for lunch or a second dinner.
Expanding Your Culinary Horizons
Once you’ve honed this Iranian crispy rice recipe, consider diving deeper into Persian gastronomy:
Sabzi Polo Mahi
A Nowruz (Persian New Year) favorite that blends fragrant herbs like dill and parsley into the rice, typically served with fish.
Tahchin
A layered rice “cake” often baked with saffron, yogurt, and chicken, forming crispy edges all around.
Adas Polo
Rice with lentils, dates, and raisins, offering a balanced sweet-savory mix.
Shirin Polo
A sweet, decorative rice dish featuring candied carrots, orange peel, and nuts—popular at festive gatherings like weddings.
Refining your skills in crispy rice paves the way for these variations and many more. Persian cuisine is vast, brimming with complexity, and each dish builds upon foundational techniques like parboiling, layering, and steaming.
Cultural and Historical Background
Iranian crispy rice (tahdig) underscores the culinary ingenuity of Persian heritage. Historically, it wasn’t merely about the taste; a well-executed crust symbolized the cook’s mastery. In Persian households, the unveiling of tahdig often becomes a moment of admiration. Friends and family may even share jokes or friendly rivalries about who gets the first or biggest piece.
Iran’s geographical and cultural diversity also influences how tahdig is made. In some regions, cooks favor bread-based crusts (like lavash), while others might incorporate potatoes or vegetables for variety. The fundamental principle remains universal: bring together simple ingredients, treat them with care, and produce a texture so distinctive it transforms the entire dining experience.
Troubleshooting Your Tahdig:
Sometimes, even careful cooks encounter mishaps. Here are ways to correct or avoid common issues:
Sticking to the Pot
If your crust refuses to release, you might have used too little oil or insufficient heat to form a cohesive layer. Gently loosen the edges with a spatula, and next time, increase the oil slightly or check your initial heat setting.
Burning
This typically happens if the heat remains too high for too long. Adjust your stove or switch to a lower flame sooner.
Lackluster Color
If the crust appears pale, your initial high-heat phase may have been too brief, or you might need a bit more oil or butter.
Dry or Undercooked Rice
Confirm that you parboiled the grains correctly and used adequate steam time on low heat. Adding a little water or saffron water before sealing the pot can help retain moisture.
By diagnosing these minor problems, you’ll steadily refine your technique. Cooking is as much about learning from mistakes as it is about following instructions to the letter. Over time, you’ll develop an intuitive feel for precisely when to lower the heat, how much oil is just right, and how to layer everything for optimal crunch.
Health Considerations:
Although Iranian crispy rice often uses oil or butter in generous amounts, mindful modifications can reduce its calorie load:
Healthier Oil Choices
Swap butter or vegetable oil for lighter alternatives like avocado oil, which tolerates higher heat and contains beneficial fats.
Less Oil, Thinner Crust
You can achieve a satisfactory crisp with a slightly smaller quantity of oil. It may be thinner, but still delicious.
Whole-Grain Rice
If you prefer whole grains, adapt your parboiling time accordingly. Brown basmati rice requires a longer soak and boil phase but can still form a crunchy bottom.
Balancing health with flavor is always possible through careful ingredient selection and portion control. Persian cuisine also offers a variety of fresh herbs, legumes, and vegetables that round out the nutritional profile of any meal.
Embracing the Joy of Practice:
The art of making tahdig is often passed down through generations, with each cook adding personal touches and discovering new twists. Don’t be discouraged if your first attempt isn’t flawless. Indeed, many Iranian cooks reminisce about how their early tries ended in partial success—perhaps a crust that stuck to the pot or came out too pale. Over time, muscle memory and sensory cues (like the smell of caramelizing rice or the sound of sizzling) guide you toward a perfected technique.
As you practice, experiment with subtle changes: different soaking times, various oils, or additional garnishes. Each iteration refines your sense of timing and temperature. That’s the beauty of this Iranian crispy rice recipe: it’s infinitely adaptable, allowing you to sculpt a version that aligns with your personal taste and style.
Sharing the Experience:
Cooking is inherently social. Invite friends or family over for a Persian-inspired feast. Encourage them to participate in each stage: rinsing the grains, monitoring the boil, flipping the pot in a dramatic reveal. Such hands-on involvement creates lasting memories and fosters a shared appreciation for Persian cuisine. If your guests are new to the concept of crispy rice, the “wow factor” when unveiling the golden crust can spark delightful conversations about global food traditions.
Frequently Asked Questions (FAQ’s)
Question: What makes Iranian crispy rice (tahdig) special?
Answer: Iranian crispy rice, known as tahdig, is a beloved dish characterized by its golden, crunchy crust formed at the bottom of the pot. It is the highlight of Persian rice dishes, offering a delightful contrast in texture between the crisp layer and the fluffy, fragrant rice above. Achieving the perfect tahdig requires the right technique, patience, and a balance of heat and moisture.
Question: What type of rice should be used for making tahdig?
Answer: Long-grain basmati rice is the best choice for making tahdig. Its delicate, non-sticky texture allows the grains to remain separate while cooking, creating a light and fluffy consistency. Aged basmati rice works particularly well, as it absorbs flavors better and produces a more distinct, crispy crust.
Question: How should the rice be prepared before cooking?
Answer: Proper preparation starts with rinsing the rice under cold water until the water runs clear. This removes excess starch, preventing the rice from becoming sticky. After rinsing, the rice should be soaked in salted water for at least 30 minutes to 1 hour. Soaking helps elongate the grains and ensures even cooking.
Question: What is the best way to parboil the rice?
Answer: To parboil, bring a large pot of water to a boil, then add the drained rice. Let it cook for about 5–7 minutes, or until the grains are slightly soft but still firm in the center. Drain the rice and rinse it with cold water to stop the cooking process. This step ensures that the final steaming results in fluffy rice with a distinct tahdig layer.
Question: How do you set up the pot for tahdig?
Answer: A nonstick or heavy-bottomed pot works best for making tahdig. Coat the bottom with a generous amount of oil, butter, or ghee to prevent sticking and enhance crispiness. Some variations include adding saffron-infused water, thinly sliced potatoes, or flatbread (lavash or tortilla) as a base for added texture and flavor.
Question: What is the proper technique for layering the rice?
Answer: Start by spreading a thin layer of rice over the oiled base and pressing it down gently. Then, pile the remaining rice on top in a mound, creating air pockets to allow even steaming. Avoid pressing down the upper layers to keep the rice light and fluffy.
Question: What is the ideal cooking temperature and time for tahdig?
Answer: Cook the rice on medium-high heat for the first 10 minutes to allow the tahdig to form. Then, lower the heat to low or medium-low, cover the lid with a clean kitchen towel (to absorb excess moisture), and steam for about 30–45 minutes. This slow cooking process ensures the tahdig develops a crispy, golden texture while the rest of the rice steams perfectly.
Question: How do you remove tahdig without breaking it?
Answer: Before serving, let the rice sit for a few minutes off the heat. Then, carefully loosen the edges using a spatula. Placing the bottom of the pot in cold water for a few seconds can also help release the crust. To serve, place a large plate over the pot and flip it upside down to reveal the crispy tahdig intact.
Question: What are some ways to enhance the flavor of tahdig?
Answer: For extra aroma and color, dissolve saffron in warm water and drizzle it over the rice before steaming. Adding a yogurt and egg mixture to the bottom layer of rice results in a richer, tangier crust. Some variations also incorporate garlic, cumin, or barberries for added depth of flavor.
Conclusion
Mastering an iranian crispy rice recipe can feel like unlocking a culinary secret, transforming simple grains into a feast of textures and flavors. With step-by-step precision and a bit of practice, you’ll soon confidently prepare a dish that embodies the warmth and hospitality of Persian cuisine. Whether you opt for the traditional stovetop method or lean on the convenience of a specialized appliance lauded by Expert Reviews Best Rice Cooker, your kitchen will fill with the enticing aroma of toasted rice and the promise of a satisfying crunch. Embrace the process, celebrate the small victories along the way, and elevate any meal—be it a casual family dinner or an elaborate banquet—with the golden crown of tahdig. By preserving the care and attention essential to Persian cooking, you’ll create a memorable centerpiece that family and friends will crave time and again.