Need a new pot? Find your Philips Rice Cooker Inner Pot Replacement with our easy guide. Ensure perfect rice with the right pot!
As an Amazon Associate I earn from qualifying purchases.
A Philips rice cooker is a valuable kitchen appliance that simplifies the process of preparing perfect, fluffy rice and grains with ease. However, over time, the inner pot of your beloved rice cooker may show signs of wear and tear, affecting its cooking performance. If you’re encountering issues like unevenly cooked rice, rice sticking to the bottom, or a damaged inner pot, it might be time for a replacement.
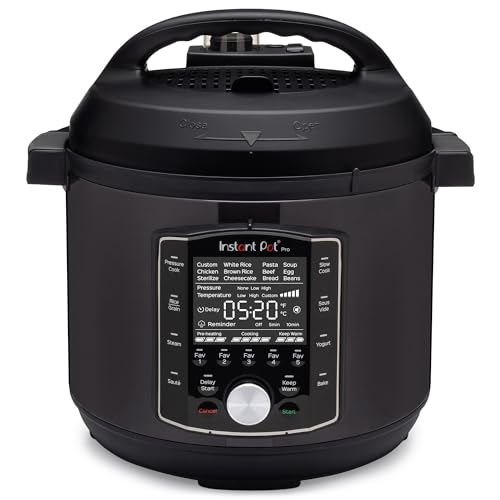
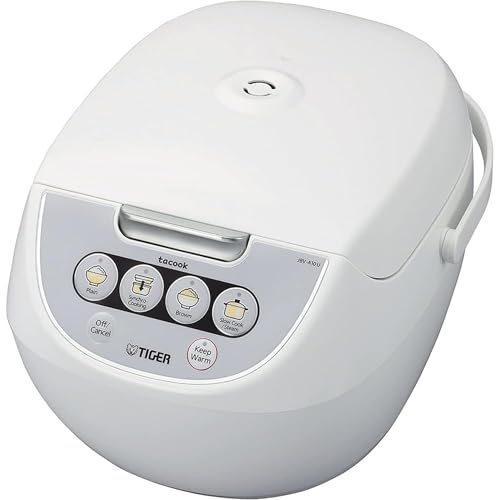
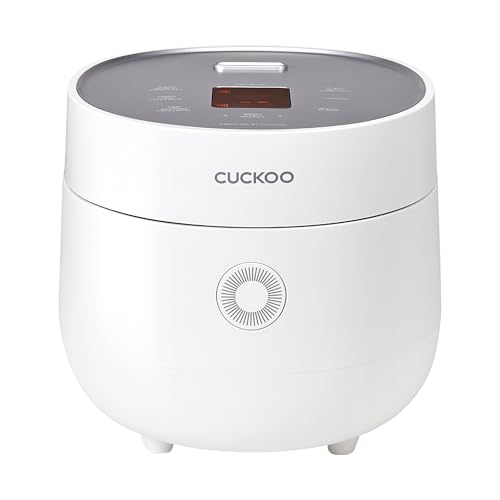
Top-Rated Rice Cooker Replacement Inner Pot
No products found.
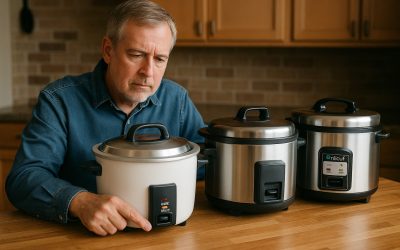
More Models We Cooked With and Evaluated


In this article, we will delve into the importance of the inner pot in your Philips rice cooker, explaining when and why you might need to replace it. We’ll also guide you through the process of identifying your rice cooker model, safety precautions, and the essential tools required for a hassle-free inner pot replacement. Whether you’re a seasoned chef or a novice in the kitchen, understanding the ins and outs of inner pot replacement is crucial to ensure your rice cooker continues to serve up delightful rice dishes for years to come. So, let’s explore the world of Philips rice cooker inner pot replacement and discover how to keep your cooking experience seamless and enjoyable.
———
Table of Contents
———
…
Understanding the Importance of the Inner Pot
- The inner pot of a Philips rice cooker is a crucial component that plays a pivotal role in the appliance’s functionality. Understanding its importance is essential for anyone who uses a rice cooker. Here are several key aspects that highlight the significance of the inner pot:
- Cooking Surface: The inner pot serves as the cooking vessel where rice and other grains are cooked. Its non-stick surface ensures that the grains do not stick to the bottom or sides, allowing for even cooking and easy serving.
- Heat Distribution: The inner pot is designed to distribute heat evenly throughout its surface. This even heat distribution is vital for cooking rice uniformly, preventing overcooked or undercooked patches.
- Capacity and Measurement: The Philips Rice Cooker Inner Pot Replacement is typically marked with measurements for water and rice, making it easy to follow the correct rice-to-water ratio for various types of rice. This ensures that you achieve the desired rice consistency, whether you prefer fluffy, sticky, or somewhere in between.
- Sealing and Venting: Many inner pots come with a sealing mechanism to trap steam during cooking. This seal is important for maintaining the right pressure and temperature inside the rice cooker. Proper sealing ensures that the rice is cooked to perfection without becoming too dry or mushy. Additionally, it prevents excess steam from escaping, which could affect the cooking process.
- Durability: The inner pot is typically made from durable materials designed to withstand high temperatures. It should be resistant to wear and tear, corrosion, and scratching, ensuring a long lifespan.
- Ease of Cleaning: The non-stick coating on the inner pot makes it easy to clean. This convenience is especially important because rice cookers are used frequently in many households.
- Compatibility: The inner pot is designed to fit perfectly within the rice cooker. It must align correctly with the heating element and other components to ensure proper functioning.
- Versatility: Some Philips rice cookers come with removable inner pots, allowing for easier serving and cleaning. This versatility enhances the overall user experience.
In summary, the inner pot of a Philips rice cooker is not just a simple cooking vessel; it’s a critical element that affects the quality of your cooked rice. Its design, materials, and features are carefully engineered to ensure that your rice is cooked to perfection, with consistent texture and taste. Proper maintenance and care for the inner pot are essential to prolong its lifespan and maintain the quality of your rice cooker.
When and Why You Need to Replace It
Replacing the inner pot of your Philips rice cooker may become necessary over time due to various reasons. Here’s when and why you might need to replace it:
- Wear and Tear: Over extended use, the non-stick coating on the inner pot may wear down or become scratched, affecting its performance. If you notice that your rice is sticking excessively, it might be time for a replacement.
- Damage: Accidental damage, such as dents, cracks, or warping of the inner pot, can compromise its functionality. Cooking with a damaged inner pot may lead to uneven cooking or even safety hazards.
- Loss of Non-Stick Properties: As the non-stick coating deteriorates, rice and other grains may begin to stick to the pot’s surface. This can result in burnt or unevenly cooked rice and make cleaning more challenging.
- Corrosion: In rare cases, especially if the inner pot is not properly cared for or cleaned, corrosion may occur. This can affect the pot’s safety and the quality of the food it cooks.
- Changes in Capacity: If your household size changes or you find yourself cooking larger or smaller quantities of rice than before, you may need an inner pot with a different capacity to meet your needs.
- Compatibility: If you upgrade to a different model or series of Philips rice cooker, the inner pot from your previous cooker may not be compatible. In such cases, you’ll need a new inner pot that fits your current rice cooker.
- Convenience: Some users prefer having a spare inner pot for convenience. This allows for easy preparation of multiple batches of rice or the option to prepare different dishes without needing to clean the pot in between.
- Hygiene: Even with proper cleaning, over time, an inner pot can accumulate stains and odors that are difficult to remove. Replacing the pot can help ensure hygiene and the absence of lingering smells in your cooked rice.
- Improved Features: If you decide to upgrade to a newer model of the Philips rice cooker that comes with enhanced features or materials, you may want to purchase a replacement inner pot that complements these improvements.
In summary, you may need to replace the inner pot of your Philips rice cooker when it shows signs of wear, damage, or reduced performance. Doing so will ensure that your rice cooker continues to function optimally, producing perfectly cooked rice and other grains. When selecting a replacement inner pot, ensure it is compatible with your specific Philips rice cooker model and capacity requirements.
Identifying Your Rice Cooker Model
Identifying your Philips rice cooker model is essential when you’re looking for a replacement inner pot or seeking support and information specific to your device. Here are steps to help you identify your rice cooker model:
- Check the User Manual: The user manual that came with your rice cooker is the most reliable source of information. Look for the model number and any identifying details on the cover or the first few pages of the manual. If you don’t have the physical manual, you may find a digital version on the Philips website.
- Inspect the Rice Cooker: Examine the exterior of your rice cooker for any labels or stickers that indicate the model number. These labels are often located on the base of the rice cooker or near the control panel. The model number is typically a combination of letters and numbers.
- Look for a Rating Label: Some rice cookers have a rating label on the bottom or side of the appliance. This label may contain not only the model number but also other important information, such as voltage specifications and manufacturing details.
- Check the Box: If you have the original packaging or box in which your rice cooker came, the model number is usually printed on the packaging. This information is especially helpful if you’ve kept the box for reference.
- Visit the Philips Website: If you’re unable to locate the model number on the rice cooker or its packaging, you can visit the official Philips website. They often have a “Product Support” or “Find your product” section where you can enter details about your appliance, including its type and any available serial numbers. This can help you identify your specific model.
- Contact Philips Customer Support: If all else fails, you can reach out to Philips customer support for assistance. They may be able to help you identify your rice cooker model using any details you can provide.
Once you have identified your Philips rice cooker model, make note of it, as you’ll need this information when purchasing replacement parts, seeking customer support, or referring to specific instructions and manuals related to your device. It ensures that you get the right inner pot or any other accessories that are compatible with your model.
Safety Precautions
Safety precautions are essential when replacing the inner pot of your Philips rice cooker to prevent accidents or damage. Here are some safety precautions to follow when replacing the inner pot:
- Unplug the Rice Cooker: Before attempting to replace the inner pot, make sure the rice cooker is unplugged from the electrical outlet. This eliminates the risk of electrical shock during the replacement process.
- Allow Cooling: Ensure that the rice cooker has cooled down completely after its last use. The inner pot and surrounding components can become very hot during cooking, and attempting to replace the inner pot while it’s still hot can lead to burns.
- Handle with Care: When removing the old inner pot, handle it carefully to avoid any accidental burns or spills. Use oven mitts or pot holders if necessary, as the inner pot may retain heat.
- Inspect for Damage: Before replacing the inner pot, inspect it for any damage or defects. Ensure that the non-stick coating is intact, there are no dents or cracks, and all handles and attachments are secure. A damaged inner pot should not be used.
- Proper Alignment: When placing the replacement inner pot, ensure it is correctly aligned with the heating element and properly seated in the rice cooker. An improperly seated inner pot may affect the cooking process.
- Secure the Lid: Before resuming cooking, make sure the rice cooker’s lid is securely closed and locked in place. This prevents steam from escaping and ensures safe and effective cooking.
- Follow User Manual: Always follow the manufacturer’s instructions and guidelines for replacing the inner pot. Different rice cooker models may have specific instructions that need to be followed.
- Clean the Replacement Pot: If the replacement inner pot is new or has been stored, clean it thoroughly according to the user manual’s cleaning instructions before use.
- Observe the Cooking Process: While the rice cooker is in operation with the replacement inner pot, do not leave it unattended. Stay nearby to monitor the cooking process and prevent potential issues.
- Use Proper Utensils: When handling the cooked rice from the replacement inner pot, use appropriate utensils, such as the rice paddle or spatula provided with the rice cooker. Avoid using metal utensils that can scratch the non-stick coating.
- Keep Out of Reach of Children: Ensure that children do not have access to the rice cooker while it’s in use or when it’s hot. The appliance’s exterior can become very hot during cooking.
- Regular Maintenance: After using the replacement inner pot, clean it according to the user manual’s instructions for maintenance and care to ensure its longevity.
By adhering to these safety precautions, you can safely and effectively replace the inner pot of your Philips rice cooker, maintaining the appliance’s functionality while minimizing the risk of accidents or damage. Always prioritize safety when working with kitchen appliances.
Gathering Necessary Tools
Gathering the necessary tools for replacing the inner pot of your Philips rice cooker is essential to ensure a smooth and safe replacement process. Here’s a list of tools and materials you may need:
- Replacement Inner Pot: Ensure you have the new or replacement inner pot that is compatible with your Philips rice cooker model.
- Phillips Screwdriver (if needed): Some rice cookers may require you to remove screws to access and replace the inner pot. If your rice cooker has screws securing the inner pot, you’ll need a Phillips screwdriver to remove them.
- Cleaning Supplies: Have cleaning supplies ready, including mild dish soap, a non-abrasive sponge or cloth, and a soft brush if necessary. You’ll need these to clean the new inner pot if it’s not pre-cleaned and to clean the rice cooker’s interior before reassembly.
- Oven Mitts or Pot Holders: These are useful for handling the old inner pot if it’s still hot from previous use.
- User Manual: Keep the user manual for your Philips rice cooker nearby. It may contain specific instructions for replacing the inner pot for your model.
- Work Area: Clear a clean and spacious work area on your kitchen countertop. Ensure it’s well-lit and free from clutter.
- Bowl or Container: Have a bowl or container ready to hold the old inner pot once you remove it. This will prevent any remaining liquid from spilling on your countertop.
- Trash or Recycling Bin: You may need a bin for disposing of any packaging materials from the new inner pot or for discarding the old inner pot if you no longer need it.
- Spare Time: Ensure you have enough time to complete the inner pot replacement without rushing. Avoid attempting the replacement when you’re in a hurry.
- Safety Precautions: Keep safety precautions in mind, such as unplugging the rice cooker before starting, allowing it to cool down if necessary, and following all safety guidelines outlined in the user manual.
By gathering these tools and materials in advance, you’ll be well-prepared to replace the inner pot of your Philips rice cooker safely and efficiently. Following the manufacturer’s instructions and taking necessary precautions will ensure a successful replacement process.
Removing the Old Inner Pot
Removing the old inner pot from your Philips rice cooker is a straightforward process, but it requires some caution, especially if the inner pot is still hot. Here are step-by-step instructions to safely remove the old inner pot:
- Unplug the Rice Cooker: Before you start, make sure the rice cooker is unplugged from the electrical outlet to eliminate any risk of electrical shock.
- Allow Cooling: If your rice cooker has been in use, allow it to cool down for a sufficient amount of time. The inner pot and the surrounding components can become extremely hot during cooking.
- Open the Lid: Lift the rice cooker’s lid to access the inner pot. If your rice cooker has a locking mechanism, release it to unlock the lid. Be cautious, as hot steam may escape when you open the lid.
- Use Oven Mitts or Pot Holders: If the inner pot is still hot, wear oven mitts or use pot holders to protect your hands from burns. Gently grasp the handles or sides of the inner pot with the mitts or pot holders.
- Lift and Tilt: Carefully lift the old inner pot from the rice cooker’s base. Tilt it slightly to allow any excess liquid to drain back into the pot.
- Inspect the Pot: As you remove the old inner pot, inspect it for any leftover rice or liquid. Make sure the inner pot is empty before placing it aside.
- Place the Old Inner Pot Safely: Set the old inner pot on a heat-resistant surface or a bowl/container if it’s still hot. Allow it to cool down completely before further handling or cleaning.
- Clean the Inner Pot Receptacle: Take a moment to inspect the inner pot receptacle inside the rice cooker. Ensure it’s clean and free of any residue or debris.
Once you have successfully removed the old inner pot, you can proceed with replacing it with a new one or perform any maintenance or cleaning tasks as needed. Always prioritize safety when handling hot kitchen appliances and components, and follow the manufacturer’s instructions and safety guidelines throughout the process.
Selecting a Replacement Inner Pot
Selecting the right replacement inner pot for your Philips rice cooker is essential to ensure proper functioning and compatibility. Here’s how to choose the correct replacement inner pot:
- Check Your Rice Cooker Model: Refer to your rice cooker’s user manual or inspect the label on the rice cooker itself to find the model number. The model number is typically a combination of letters and numbers.
- Visit the Philips Website: Go to the official Philips website and navigate to the “Support” or “Product Support” section. There may be a “Find your product” or “Product Search” feature where you can enter your rice cooker’s model number.
- Search for Replacement Parts: Use the model number to search for replacement parts, specifically the inner pot, on the Philips website or authorized Philips parts retailers. Look for the inner pot that matches your specific rice cooker model.
- Ensure Compatibility: Carefully review the product description and specifications of the replacement inner pot to ensure that it is compatible with your rice cooker model. Check for any additional notes or compatibility information provided by the manufacturer.
- Consider Capacity: Pay attention to the capacity of the replacement inner pot. Inner pots come in various sizes to accommodate different serving capacities. Ensure that the replacement inner pot’s capacity matches or closely matches the original inner pot’s capacity to avoid overfilling or underutilizing the rice cooker.
- Choose Material and Coating: Inner pots may be available in different materials and coatings. Common options include non-stick coatings and stainless steel. Select the material and coating that align with your cooking preferences and needs. Non-stick coatings are convenient for easy cleaning, while stainless steel is durable and long-lasting.
- Review User Feedback: If available, read user reviews or feedback for the replacement inner pot you are considering. This can provide insights into the quality and performance of the product from those who have purchased and used it.
- Purchase from a Reputable Source: Ensure that you purchase the replacement inner pot from an authorized Philips parts retailer or an established and reputable seller. This helps guarantee product authenticity and quality.
- Check Warranty: Confirm if the replacement inner pot comes with any warranty or return policy. Understanding the warranty terms can provide peace of mind in case of any issues with the product.
- Price Consideration: Compare prices from different retailers to ensure you are getting a competitive deal on the replacement inner pot. Be cautious of unusually low prices, as they may indicate counterfeit or subpar products.
Once you have identified the correct replacement inner pot for your Philips rice cooker and are satisfied with its specifications, compatibility, and price, you can confidently make the purchase. Installing the replacement inner pot following the manufacturer’s instructions will help restore your rice cooker to optimal functionality.
Installing the New Inner Pot
Installing the new inner pot in your Philips rice cooker is a straightforward process, but it’s essential to do it correctly to ensure proper functioning. Here are the steps to install the new inner pot:
- Ensure Safety Precautions: Before you begin, make sure the rice cooker is unplugged from the electrical outlet. Safety should always be a priority when working with kitchen appliances.
- Inspect the New Inner Pot: Examine the new inner pot to ensure it’s clean and free from any packaging materials or residue. If necessary, wash it with mild dish soap and rinse thoroughly. Dry it completely before installation.
- Position the Inner Pot: Place the new inner pot into the rice cooker’s heating base. Ensure that it sits securely and aligns correctly with the heating element. It should fit snugly into the receptacle in the base.
- Check for Alignment: Verify that the new inner pot is correctly aligned. The handles of the inner pot should be facing outward and easily accessible for handling.
- Confirm Proper Seating: Push the inner pot down gently but firmly to ensure it’s properly seated in the receptacle. You may hear a slight click or feel a secure fit when it’s correctly in place.
- Close the Lid: If the rice cooker has a locking mechanism on the lid, make sure to lock it securely. This ensures that the lid is properly closed during cooking.
- Plug In the Rice Cooker: After confirming that the new inner pot is correctly installed and the lid is securely closed, plug the rice cooker back into the electrical outlet.
- Power On the Rice Cooker: Turn on the rice cooker using the appropriate settings as per your recipe or cooking instructions.
- Monitor Cooking: Stay nearby to monitor the cooking process, especially during the first use with the new inner pot. Ensure that the rice cooks evenly and without any issues.
- Enjoy Your Meal: Once the rice cooker completes the cooking cycle, use appropriate utensils like the rice paddle or spatula to serve your perfectly cooked rice or grains from the new inner pot.
By following these steps, you can safely and effectively install the new inner pot in your Philips rice cooker. Proper installation ensures that your rice cooker functions as intended and delivers delicious, evenly cooked rice and other grains. Always refer to your rice cooker’s user manual for any model-specific instructions or guidelines related to inner pot installation.
Testing Your Rice Cooker
After installing the new inner pot in your Philips rice cooker, it’s important to conduct a test run to ensure that the appliance is functioning correctly and that the new inner pot is properly installed. Here’s how to test your rice cooker:
Preparation:
- Ensure that the rice cooker is properly plugged into a functioning electrical outlet.
- Make sure the new inner pot is correctly installed in the rice cooker’s base.
Water Test:
- Fill the new inner pot with water up to the recommended water level for the amount of rice you plan to cook. Refer to your rice cooker’s user manual for guidance on water levels.
- Close the rice cooker’s lid securely.
Select the Cooking Mode:
- Choose the appropriate cooking mode on your rice cooker. Most rice cookers have settings for white rice, brown rice, and sometimes additional options like sushi rice or porridge. Select the mode that corresponds to the type of rice you plan to cook.
Start the Cooking Cycle:
- Begin the cooking cycle by pressing the start button or turning the rice cooker on, depending on your model.
Observe the Cooking Process:
- Watch the rice cooker as it heats and cooks the water. Pay attention to any unusual sounds or behaviors.
- During the cooking process, the rice cooker’s indicator lights may change or turn off once the rice is cooked. Some models also have audible signals to indicate when the rice is ready.
Check for Steam and Aroma:
- You should see steam escaping from the vent on the rice cooker’s lid. This is a normal part of the cooking process.
- As the rice cooks, you may also notice the pleasant aroma of freshly cooked rice.
Completion of the Cooking Cycle:
- Once the cooking cycle is complete, the rice cooker may automatically switch to a “Keep Warm” mode to keep the rice warm until you’re ready to serve it.
Open the Lid Carefully:
- When the cooking cycle is finished, open the rice cooker’s lid carefully to avoid being hit by hot steam. Open it away from your face and hands.
Check the Rice:
- Examine the cooked rice to ensure that it’s fully cooked and has the desired texture. It should be evenly cooked without any undercooked or burnt portions.
Taste Test:
- Taste a small portion of the cooked rice to ensure that it’s cooked to your liking. Adjust the water level or cooking time if necessary for future batches.
Clean-Up:
- After the test run, unplug the rice cooker and allow it to cool down. Empty the inner pot, and wash it along with any utensils used for tasting.
By conducting a water test, you can confirm that your Philips rice cooker is working correctly with the new inner pot. If you notice any issues during the test run, such as uneven cooking or unusual sounds, consult your rice cooker’s user manual or contact Philips customer support for assistance. Once you’re satisfied with the test results, you can confidently use your rice cooker to prepare your favorite rice and grain dishes.
Maintenance and Cleaning
Proper maintenance and cleaning of your Philips rice cooker, including its inner pot, are essential to ensure its longevity and continued performance. Here’s a guide on how to maintain and clean your rice cooker:
1. Unplug and Cool Down:
- Always unplug the rice cooker from the electrical outlet before cleaning or performing maintenance.
- Allow the rice cooker and inner pot to cool down to a safe temperature before handling them.
2. Remove Excess Food:
- After each use, remove any leftover rice or food from the inner pot using a rice paddle or spatula. Be gentle to avoid scratching the non-stick coating.
3. Wash the Inner Pot:
- Remove the inner pot from the rice cooker.
- Wash the inner pot with warm, soapy water using a non-abrasive sponge or cloth.
- Avoid using abrasive materials, harsh chemicals, or steel wool, as they can damage the non-stick coating.
- Rinse the inner pot thoroughly with clean water.
4. Clean the Exterior:
- Wipe down the exterior of the rice cooker with a damp cloth or sponge to remove any food residue or splatters.
- Avoid allowing water to enter the rice cooker’s electrical components.
5. Clean the Lid:
- Remove the inner lid from the rice cooker, if it’s detachable, and wash it with warm, soapy water.
- Clean the inner side of the rice cooker’s main lid as well, if accessible.
- Rinse and dry both lids before reassembling.
6. Clean the Heating Element Area:
- Carefully wipe the heating element area inside the rice cooker with a damp cloth or sponge. Ensure it’s free from any food particles or debris.
- Be cautious not to damage the heating element while cleaning.
7. Descaling (if necessary):
- If your rice cooker has mineral deposits or scale buildup due to hard water, you can descale it periodically.
- Prepare a solution of equal parts white vinegar and water.
- Fill the inner pot with the solution up to the recommended water level.
- Run a complete cooking cycle without rice. This will help remove scale deposits.
- Rinse the inner pot thoroughly with clean water several times to remove any vinegar residue.
8. Drying:
- Ensure that all cleaned components, including the inner pot and lids, are completely dry before reassembling or storing the rice cooker. Dampness can lead to mold or electrical issues.
9. Reassemble:
- Put all the cleaned components back together, including the inner pot, inner lid, and main lid, if applicable.
10. Storage:
- Store the rice cooker in a dry and cool place with the lid open to allow for ventilation and prevent moisture buildup.
11. Regular Maintenance:
- Check your rice cooker’s user manual for any specific maintenance recommendations or tips provided by the manufacturer.
By following these cleaning and maintenance guidelines, you can keep your Philips rice cooker in excellent condition, ensuring that it continues to produce perfectly cooked rice and grains for years to come. Regular cleaning also prevents the buildup of food residues and helps maintain the appliance’s hygiene and safety.
Troubleshooting Common Issues
Troubleshooting common issues with your Philips rice cooker can help you address problems and ensure it functions correctly. Here are some common issues and their solutions:
1. Rice Sticking to the Bottom:
- Solution: Ensure you’re using the correct rice-to-water ratio for your rice type and that you’re not overfilling the inner pot. Use a non-stick spatula or paddle to gently fluff the rice after cooking to prevent sticking.
2. Unevenly Cooked Rice:
- Solution: Make sure you’re distributing the rice evenly in the inner pot before cooking. If the issue persists, check the heating element for any signs of damage or malfunction, and contact customer support if needed.
3. Rice Too Dry or Mushy:
- Solution: Adjust the water level or rice-to-water ratio based on your preferences. You can also experiment with different rice types or cooking modes to achieve the desired consistency.
4. Rice Cooker Doesn’t Start:
- Solution: Ensure that the rice cooker is correctly plugged into the electrical outlet. If it still doesn’t start, check for any blown fuses or tripped circuit breakers in your home’s electrical system. If the issue persists, contact customer support.
5. Rice Cooker Overflows:
- Solution: Avoid overfilling the inner pot with rice and water. Follow the recommended fill levels in the user manual. If the rice cooker consistently overflows, it may indicate a malfunction, and you should seek professional assistance.
6. Steam Escaping from Lid:
- Solution: Ensure that the lid is correctly sealed and locked during cooking. If steam continues to escape, inspect the lid gasket for any damage or debris. Replace the gasket if necessary.
7. Error Codes or Indicator Lights:
- Solution: Refer to your rice cooker’s user manual for a list of error codes and their meanings. Follow the instructions provided in the manual to troubleshoot and resolve the specific error.
8. Inner Pot Doesn’t Fit or Lock:
- Solution: Check that you’re using the correct inner pot that is compatible with your rice cooker model. Ensure that the inner pot is correctly aligned and seated in the receptacle before trying to lock it in place.
9. Strange Odors or Tastes:
- Solution: If you notice unusual odors or tastes in your rice, clean the rice cooker thoroughly, paying attention to the inner pot, inner lid, and heating element. It’s possible that residues or burnt particles are affecting the flavor.
10. Noisy Operation:
- Solution: Rice cookers can emit clicking or hissing sounds during operation, which is often normal. However, if you notice loud or unusual noises, it may indicate an issue with the heating element or other components. Contact customer support for assistance.
If you encounter persistent issues with your Philips rice cooker that you can’t resolve through troubleshooting, it’s advisable to contact Philips customer support or seek assistance from an authorized service center for professional repairs or guidance. Always prioritize safety when dealing with kitchen appliances and electrical equipment.
Extending the Lifespan of Your Inner Pot
Extending the lifespan of your Philips rice cooker’s inner pot is essential to ensure the longevity and performance of your appliance. Here are some tips to help you take care of your inner pot:
1. Use Appropriate Utensils:
- When cooking and serving rice, use utensils that are gentle on the non-stick coating of the inner pot. Avoid using metal utensils that can scratch or damage the surface. Opt for wooden, silicone, or plastic utensils instead.
2. Proper Cleaning:
- Clean the inner pot promptly after each use to prevent food residues from hardening and becoming difficult to remove. Use warm, soapy water and a non-abrasive sponge or cloth.
- Avoid abrasive cleaners, steel wool, or harsh scrubbing, as they can damage the non-stick coating.
- If stubborn food particles are stuck to the inner pot, soak it in warm, soapy water to loosen them before cleaning.
3. Avoid High Heat:
- While using your rice cooker, avoid using excessive heat settings that can lead to burnt rice or other grains. Follow the recommended heat settings and water-to-rice ratios in the user manual for optimal results.
4. Use Appropriate Rice Types:
- Be mindful of the rice types you use in your rice cooker. Some rice varieties may have a higher starch content and can be stickier. Rinse these types of rice thoroughly before cooking to reduce starch buildup.
5. Regular Maintenance:
- Periodically inspect the inner pot for any signs of damage or wear. If you notice scratches, peeling of the non-stick coating, or other issues, consider replacing the inner pot to maintain cooking quality.
- Check for loose handles or attachments and ensure they are securely fastened.
6. Avoid Overfilling:
- Follow the recommended maximum fill levels indicated in the user manual to avoid overfilling the inner pot. Overfilling can lead to spillage, uneven cooking, and potential damage to the appliance.
7. Be Gentle with Cleaning Tools:
- When cleaning the inner pot, use a soft sponge or cloth. Avoid abrasive materials that can scratch the non-stick coating.
- Use gentle, circular motions when cleaning to avoid applying excessive pressure.
8. Use Quality Ingredients:
- Choose quality rice and grains, as lower-quality ingredients may release excess starch or contaminants that can affect the inner pot over time.
9. Store Properly:
- After cleaning and drying the inner pot, store it separately from the rice cooker in a cool, dry place. Avoid stacking heavy objects on top of it, which can cause deformation.
10. Regular Descaling (if needed):
- If you have hard water in your area and notice scale buildup, periodically descale the inner pot and the rice cooker following the manufacturer’s guidelines to maintain performance.
By following these tips and practicing proper care and maintenance, you can extend the lifespan of your Philips rice cooker’s inner pot, ensuring that it continues to provide consistent and delicious rice and grain dishes for years to come.
Frequently Asked Questions (FAQ’s)
Here are some expertise questions and answers related to Philips rice cooker inner pot replacement:
Q: How do I know if I need to replace the inner pot of my Philips rice cooker?
A: You may need to replace the inner pot if you notice signs of damage, such as scratches, peeling of the non-stick coating, or dents. Additionally, if the inner pot is no longer performing well and is affecting the quality of your cooked rice, it may be time for a replacement.
Q: Where can I purchase a replacement inner pot for my Philips rice cooker?
A: You can purchase a replacement inner pot for your Philips rice cooker from authorized Philips retailers, appliance parts stores, or the official Philips website. Make sure to verify the compatibility with your specific rice cooker model.
Q: How do I find the correct replacement inner pot for my Philips rice cooker model?
A: To find the correct replacement inner pot, refer to your rice cooker’s user manual for compatibility information and model numbers. You can also visit the official Philips website and use their product search feature, entering your rice cooker’s model number.
Q: Can I use a non-Philips inner pot as a replacement in my Philips rice cooker?
A: While it’s best to use a genuine Philips replacement inner pot for compatibility and performance assurance, some third-party inner pots may work with your rice cooker. Ensure that the replacement is compatible and of good quality.
Q: Are replacement inner pots available in different materials, and which should I choose?
A: Replacement inner pots may be available in different materials, such as non-stick coated or stainless steel. The choice depends on your preferences. Non-stick coated inner pots are easy to clean, while stainless steel inner pots are durable and long-lasting.
Q: Is it necessary to season or oil a new replacement inner pot before use?
A: Most modern rice cookers, including those with non-stick inner pots, do not require seasoning or oiling before use. Follow the manufacturer’s instructions for your specific model, and you should be able to use the replacement inner pot directly.
Q: How often should I replace the inner pot of my Philips rice cooker?
A: The inner pot’s lifespan depends on usage and care. With proper maintenance and careful use of utensils, the inner pot can last several years. Consider replacing it if you notice signs of damage, peeling non-stick coating, or decreased cooking performance.
Q: Can I recycle the old inner pot when replacing it with a new one?
A: Whether you can recycle the old inner pot depends on your local recycling program and the materials used in the inner pot. Check with your local recycling authorities to determine the appropriate disposal or recycling method for the old inner pot.
Q: How do I identify the correct replacement inner pot for my Philips rice cooker model?
A: To identify the correct replacement inner pot, check your rice cooker’s user manual for compatibility information and model numbers. You can also visit the official Philips website and use their product search feature to find the right replacement inner pot based on your rice cooker’s model.
Q: Can I use a non-Philips inner pot as a replacement in my Philips rice cooker?
A: While it’s best to use a genuine Philips replacement inner pot to ensure compatibility and performance, some third-party inner pots may work with your rice cooker. However, be cautious and check for compatibility and quality before using a non-Philips inner pot.
Q: How often should I replace the inner pot of my Philips rice cooker?
A: The inner pot’s lifespan depends on usage and care. With proper maintenance and careful use of utensils, the inner pot can last several years. Consider replacing it if you notice signs of damage, peeling non-stick coating, or decreased cooking performance.
Q: Are there any specific cleaning instructions for the replacement inner pot?
A: Cleaning instructions for the replacement inner pot are typically similar to those for the original inner pot. Use warm, soapy water and a non-abrasive sponge or cloth for cleaning. Avoid abrasive materials and harsh chemicals to protect the non-stick coating.
Q: Can I replace the inner pot myself, or should I seek professional assistance?
A: Replacing the inner pot is a user-friendly process, and many individuals can do it themselves by following the manufacturer’s instructions. However, if you’re unsure or encounter difficulties, it’s advisable to seek professional assistance or contact Philips customer support for guidance.
Q: Is it necessary to season or oil a new replacement inner pot before use?
A: Most modern rice cookers, including those with non-stick inner pots, do not require seasoning or oiling before use. Simply follow the manufacturer’s instructions for your specific model, and you should be able to use the replacement inner pot directly.
Q: Can I recycle the old inner pot when replacing it with a new one?
A: Whether you can recycle the old inner pot depends on your local recycling program and the materials used in the inner pot. Check with your local recycling authorities to determine the appropriate disposal or recycling method for the old inner pot.
Conclusion
Replacing the inner pot of your Philips rice cooker is a straightforward yet vital maintenance task that can breathe new life into your trusty kitchen companion. As we conclude this article, let’s recap the key takeaways and emphasize the importance of this process.
The inner pot plays a pivotal role in the cooking process, and its condition directly impacts the quality of your rice and grain dishes. Over time, wear and tear, scratches, or a damaged non-stick coating can lead to subpar results. Recognizing when to replace the inner pot is crucial for maintaining the excellent performance of your Philips rice cooker.
We’ve explored the steps to identify your rice cooker model, gathered the necessary tools, followed safety precautions, and successfully replaced the inner pot. By following these guidelines, you can enjoy consistently delicious and perfectly cooked rice and grains.
Remember that the inner pot replacement process is not only about convenience but also about safety. Handling kitchen appliances should always prioritize safety to avoid accidents and ensure the longevity of your appliance.
With a new, well-fitted inner pot, your Philips rice cooker is poised to continue serving up mouthwatering rice dishes for years to come. By taking care of your inner pot and the overall maintenance of your rice cooker, you can look forward to countless delectable meals, making your culinary adventures all the more enjoyable.